


How to Repair Damaged Hair & Stop Breakage — A Step By Step Recovery Plan
- OOF!
- Jun 12, 2025
- 9 min read
Updated: Oct 17, 2025
Hair catastrophe? We've got you.
We recently worked with a long time customer to find answers to this question. She had very long, bleached (beautiful!) blonde hair. Catastrophe struck and bleach was left on her hair too long.
Her hair was damaged and her once beautiful hair was falling out in chunks. She was understandably distraught and looking for help.
We guided her through the same gentle repair steps we’re sharing here, and within a few weeks, her hair started to come back to life stronger and softer.
This was an extreme case, but many times damage is not instant. It creeps up over time through coloring, heat, rough towels, or even washing too often. Little by little, the outer layer of your hair (the cuticle) breaks down, leaving your strands weak and dry.
You may have damaged hair if it:
Feels dry, brittle, or tangles easily.
Snaps or stretches strangely when wet.
Refuses to hold a style or looks limp and dull.
💡 The good news? Even overprocessed, fragile hair can recover with patience, balance, and the right gentle routine. Let’s rebuild it—step by step.
Damaged Hair Recovery Plan: Phase 1 — Stop Hair Breakage
Step 1 — Prevent Further Damage

When your hair is extremely damaged, the first and most important step is simple: stop doing anything that causes more harm.
That means taking a break from heat styling, chemical treatments, tight hairstyles, and anything that adds stress or strain.
Think of this stage as triage for your hair. The goal is to protect what’s left and give your strands a chance to recover.
Treat your hair like delicate fabric:
Use a gentle t-shirt hair towel like the HALO™ for drying.
Sleep on a satin or silk pillowcase to reduce friction and prevent breakage.
Avoid brushing or pulling when it’s wet.
These small habits make a huge difference in keeping fragile, overprocessed hair from breaking further while you begin the healing process.
💬 Real Customer Review: The HALO “Saved My Hair”
"...A hairdresser left bleach on too long, and my hair started breaking and falling out in clumps! I found these towels and they really did save so much of my hair. I love them and will never go back to regular towels. Thank you! 🥰❤️”— Amazon Review
Step 2: Don't Over Treat Damaged Hair With Protein
So, what about protein?
Most hair products that promise to repair damaged hair do it with protein — and yes, protein is great. It helps strengthen and rebuild your hair’s structure (yay!).
But here’s the tricky part: too much protein can actually make things worse. When the protein-to-moisture balance tips too far, your hair can become dry, stiff, and even more prone to breakage (womp, womp).
If you’ve ever wondered what kinds of proteins are hiding in your hair products, here’s a quick guide:

It seems counterintuitive, but using lots of “anti-breakage” or “strengthening” products can sometimes lead to more breakage and damage. That’s called protein overload — when your hair gets too much protein and not enough moisture to stay flexible.
💡 Pro Tip: If your hair feels rough, crunchy, or starts snapping easily after using protein products, it may be time to rebalance with hydration.
Now that you understand what not to do, here’s how to start repairing your damaged hair.
Hair Recovery Plan: Phase 2 — Repair & Rebuild Damaged Hair
Step 3 — Shampoo For Damaged Hair

When your hair is damaged, even your daily wash routine matters.
Choose a shampoo without harsh sulfates. Sulfates (listed as sodium lauryl sulfate and sodium laureth sulfate in ingredient lists) are harsh surfactants that can cause dryness and breakage.
Protein-heavy “repair” formulas can leave hair brittle. You want a shampoo that’s moisturizing but balanced — one that cleans gently, hydrates deeply, and supports your scalp without adding stress.
Since damaged hair is prone to breakage, your shampoo should include hydrating ingredients including moisturizing oils and butters, such as jojoba oil, argan oil, and cocoa butter.
Here are some sulfate‑free, low‑protein shampoos that include hydrating ingredients, plus moisturizing oils and butters.
Here are a few OOF!-approved options to try:
OOF! K.I.S.S. Daily Shampoo Bar — A hydrating bottle-less option with argan oil and cocoa butter.
Amika HydroRush Shampoo — A moisture-rich formula with squalane and hyaluronic acid.
Nécessaire The Shampoo — Clean, fragrance-free formula with niacinamide and aloe vera.
💡 Pro Tip: Focus shampoo on your scalp and let the suds rinse through your ends — it’s enough to refresh without drying them out.


Step 4 — Conditioners for Damaged Hair (Regular Conditioning)
If your hair has more than a little damage from a color or heat catastrophe, consistency is key.
You’ll want to use a low-protein conditioner regularly and a high-protein conditioner every two weeks.(Yes, really! That’s all you need. Do NOT overdo it with the protein!)
When hair is overprocessed, it’s not just missing one thing — it’s lost both moisture and protein.Your goal is to rebuild slowly, alternating moisture-rich products with light protein care.

Use a conditioner that provides hydration with ingredients like avocado oil, castor oil, shea butter, or jojoba oil.These help restore your hair’s moisture balance and elasticity.
💡 Remember: This is your regular conditioner, not the deep conditioning or protein treatment you’ll use every week or two.
Here are a few of our favorite conditioners that deliver hydration and strength without tipping the protein scale:
OOF! K.I.S.S. Daily Conditioner Bar — Hydrating and lightweight with cocoa butter and jojoba oil to smooth and soften.
Amika Hydro Rush Conditioner — Moisturizing with squalane and hyaluronic acid.
Nécessaire The Conditioner — With niacinamide and argan oil to support hydration.
💡 Pro Tip: Leave your conditioner on for 3–5 minutes, then rinse with cool water to help seal the cuticle and lock in moisture.


Step 5 — Deep Conditioning Treatments for Damaged Hair
Now that you have a good, basic shampoo and conditioner routine for gentle, hydrating support, it’s time to focus on deep conditioning.

These are your once-a-week treatments packed with both protein and moisture — essential for rebuilding strength, improving elasticity, and restoring shine.
Choose a high-protein, high-moisture formula that supports your recovery without overloading your hair.
💡 Remember: damaged hair needs balance — too little protein and it stays weak, too much and it becomes brittle.
Weekly Deep Conditioning Protein Treatments
If your hair has more than a little damage, start with a weekly treatment. Every one to two weeks is all you need — more isn’t better.
Here are a few of our favorites for repairing and strengthening damaged hair:
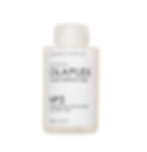
Olaplex No. 3 Hair Perfector — Rebuilds broken bonds and helps prevent future breakage.
Briogeo Don’t Despair, Repair! Deep Conditioning Mask — Restores elasticity and moisture with rosehip oil and algae extract.
💡 Pro Tip: Apply your treatment to damp hair, then wrap it in your HALO™ T-Shirt Hair Towel to trap gentle warmth. It helps the formula absorb more deeply—no heat cap required.

🌿 At-Home Deep Conditioning Masks
Want to keep it simple, natural, and on budget? Make your own DIY deep conditioning mask using ingredients that hydrate, strengthen, and smooth.
These natural ingredients nourish and repair without harsh chemicals:
Avocado: Moisturizes and smooths frizz.
Coconut Oil: Adds moisture and reduces protein loss.
Honey: Attracts and retains hydration.
Olive Oil: Adds shine, reduces breakage, and smooths the cuticle.
Yogurt: Adds light protein while soothing the scalp.
Banana: Reduces frizz and improves elasticity.
Egg Yolk: Strengthens and adds shine with biotin and healthy fats.
🧴 DIY Example: Mix avocado, honey, and egg yolk for a rich, nourishing mask that leaves hair soft, hydrated, and strong.

Step 6: Use Hair Oil Serums or Hair Oils for Daily Moisture
Damaged hair struggles to retain the moisture it so desperately needs. That’s where a good sealing oil comes in.
These oils help your hair hold onto hydration by forming a protective barrier around the hair shaft. After washing and conditioning, a sealing oil helps “lock in” that moisture so it doesn't evaporate.
After washing and conditioning, apply a few drops to damp or dry hair, focusing on your ends.This step reduces frizz, improves manageability, and minimizes breakage — all while supporting your hair’s healing process.
💡 Pro Tip: A little goes a long way. Start with 1–2 drops and warm them between your palms before applying.


Step 7 — Protect & Maintain
Once your hair starts feeling stronger and more hydrated, it’s all about keeping your hair protected from future damage and maintain the healthy moisture balance you’ve worked so hard to rebuild.
These simple habits — scalp oiling, gentle drying and styling, and regular trims or hair dusting — help your hair grow faster, stay softer, and hold onto that healthy shine.
💡 Think of this step as maintenance mode: gentle, consistent care that keeps your recovery on track.
Get Your Hair Growing Fast with Scalp Oiling (Rosemary & Castor Oil)
Hair oiling can play a major role in achieving fuller, healthier, and stronger hair.There’s growing evidence that certain oils can help accelerate hair growth by nourishing follicles, boosting circulation, and improving scalp health.
💡 Bonus: A consistent scalp oiling routine can also reduce dryness, itchiness, and buildup — creating a healthier foundation for new growth.
Two of the most effective and well-studied oils for hair growth are rosemary oil and castor oil.

A 2015 study found that rosemary oil performed just as well as 2% minoxidil (a pharmaceutical hair growth treatment) for promoting regrowth.
Castor oil improves scalp circulation and nourishes follicles with its high ricinoleic acid content — helping to stimulate growth while reducing shedding.
How to Do Scalp Oiling for Hair Growth
Mix 4–5 drops of rosemary essential oil into 1 tablespoon of castor oil.
Apply the oil blend to the scalp area.
Use your fingertips or a silicone scalp massager.
Gently massage in circular motions for 3–5 minutes.
Leave it on for at least 30 minutes (or overnight for a deeper treatment).
Wash thoroughly with a gentle, sulfate-free shampoo.

💡 Pro Tip: Do this 2–3 times per week for best results. Consistency is key — it’s not about how much oil you use, but how regularly you do it.
Product Pick: Scalp Oiling Made Easy
If you’d rather skip the mixing, try this ready-to-use blend:
Plant Therapy Rosemary & Castor Oil — A pre-blended formula with the ideal ratio of rosemary and castor oils to encourage growth and strengthen roots.

Drying & Styling Hair (Without Damage)
Even after all your progress, heat and friction can undo it fast. You want to dry and style smarter so your hair stays healthy and strong.
💡 Think “low and slow” — low heat, slow and gentle handling.
Use a T-Shirt or T-Shirt Hair Towel
Traditional towels (terrycloth or microfiber) create friction that roughs up your hair cuticle, leading to frizz and breakage.The HALO T-Shirt Hair Towel is made from smooth, breathable cotton jersey knit, designed to gently absorb excess water.
Because cotton jersey has a much lower surface area than microfiber or terrycloth, it is ideal for drying damaged hair.
💡 Pro Tip: Wrap your hair gently in your HALO to absorb moisture while you do your skincare or makeup, then air dry the rest of the way.

Using Heat Protectant with Hot Tools
Once your hair is mostly dry, you can safely style it — just make sure it’s protected.
Whenever you reach for a blow dryer, flat iron, or curling wand, apply a heat protectant spray or serum first.These formulas create a lightweight barrier that shields the cuticle from direct heat.
Stick to a low or medium heat setting (below 350°F).
Trimming and Hair Dusting
Trimming every 8–12 weeks helps remove split ends before they travel up the hair shaft and cause further breakage, preserving the length you’re working so hard to grow.
If you're not ready for a big chop, hair dusting is a gentler method: it involves snipping just the very tips of damaged strands (usually less than 1/8 inch), focusing only on visibly frayed or split ends.

Dusting can be done more frequently—every few weeks—and helps maintain softness and manageability without sacrificing growth.
It’s especially helpful if your hair feels rough, tangles easily, or has uneven texture from breakage. Combined with gentle handling and moisture-rich care, these small trims make a big difference in how quickly and beautifully your hair bounces back.
Damaged Hair Recovery That Heals More Than Just Your Hair
Healthy hair recovery doesn’t happen overnight, but every gentle step adds up. By focusing on moisture first, avoiding protein overload, and building small habits, you’re giving your hair the time and care it needs to heal.
Your damaged hair recovery plan isn’t about perfection — it’s about balance. Hydrate when it’s dry, add protein when it’s weak, and protect it always.
At OOF!, we believe in gentle routines that heal more than just your hair. Every purchase helps support WOOF! by OOF!, our give-back initiative that helps animals in need.
Products to Use for Your Damaged Hair Recovery Plan
You don’t need a shelf full of products to bring your hair back to life — just the right ones, used consistently. Here’s a quick guide to the OOF! favorites (and a few other must-haves) that make each step of your damaged hair recovery plan easy, gentle, and effective.
Step | Product | Why It Helps |
Step 1: Stop the Damage | Smooth cotton jersey fabric reduces friction and frizz while drying, helping protect fragile strands from breakage. | |
Step 2: Balance Protein & Moisture | Gentle, low-protein formulas that cleanse and hydrate without stripping or weighing hair down. | |
Step 3: Deep Conditioning Treatments | Restores moisture and elasticity with nourishing oils and a touch of protein. | |
Step 4: Daily Moisture | Locks in hydration and reduces frizz while protecting ends. | |
Step 5: Scalp Oiling for Growth | Boosts circulation and supports new growth for fuller, stronger hair. | |
Step 6: Protect & Maintain | Gentle hold that prevents creasing and breakage. Perfect for sleeping or styling. |


